Seal all Gaps in your Homes

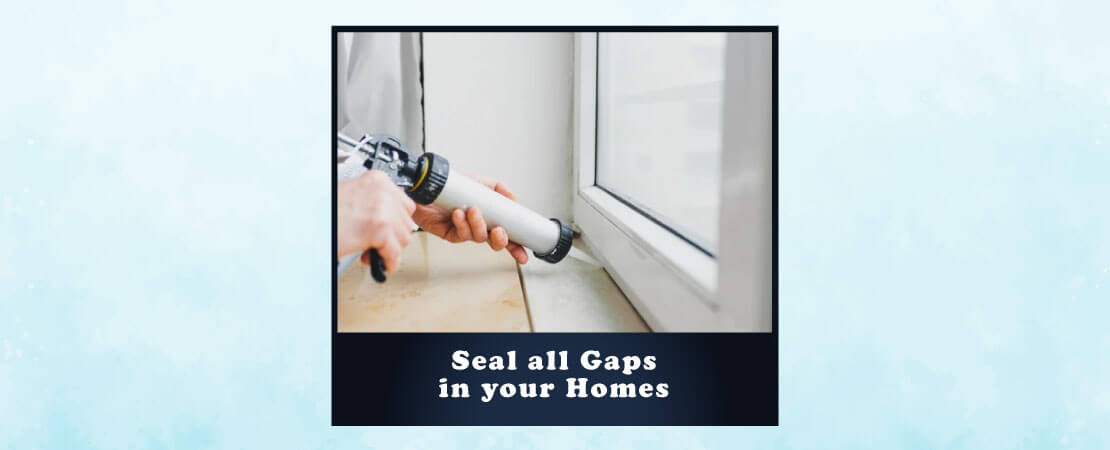
Most of us are so busy that we cannot even look after our home/property, so that it remains maintained in a good condition for a long time. During monsoon, we sometimes observe the presence of moisture or patches around the window or even water seepage. This usually happens due to gaps around window frame caused by sealant deterioration1 which is often over looked by a homeowner or resident. Besides, many people may not be knowing about these unfilled gaps, the reason behind it and negative effects. Hence it gets unnoticed and the result is a costlier repair & unwanted hassles.

Let us understand first – What is a Sealant?

A Sealant is a liquid form of material that usually looks, feels, and acts like a gel. Sealant is a substance used to block the passage of fluids through the surface or joints or openings in a material. For better understanding, it is a material that is used to seal the joints between materials such as concrete, aluminum etc. In general, joints are provided in the structures to prevent the damage produced by stresses.

A Sealant can keep its elasticity & stability in both temperatures – high & low. Additionally, it is resistant to other chemicals, moisture and weathering.

Application of Sealant in Home

Sealants are used between materials having different thermal movement. In addition, these are also used in the glazing joints and sealing of porous surfaces to non-porous surfaces. The areas where sealants are used in the homes are:

  • Gap between wall and window frame at both sides (i.e. gap around the window frame)
  • Gap around the door frame
  • Gap around sink installation in your kitchen
  • Gap around AC gas pipe2 Sleeve
  • Joint between furniture pedestal and floor

Apart from these, there are other gaps in homes like tile joints in the bathroom, counter stone joints in the kitchen etc. which need to be filled. But as the material is the same, tile or stone grout3 can be used in the joints.

Difference from other fillers (grout)

Let us just understand the difference between sealant and grout:

Sl. No. Sealant Grout
1 A sealant typically refers to a high performance compound having more expensive ingredients, little shrinkage, excellent weathering and UV resistance. A grout is any intermediate performance compound. Typically being lower quality.
2 It is usually flexible material. It is a rigid material.
3 It provides long service life cycles from 10 – 20 years. It has a service life of around 5 years.
4 It is costlier than grout. It is cost-effective.

Beside the above differentiation, there may be different materials (like tile and counter stone joint) having different movements due to thermal changes. In that case use a sealant, as it works well where differential movement can cause your grout to crack. It is very important to choose junction filler wisely to increase its longevity.

Desirable Properties

Sealants used in filling gaps, joints and cracks must be shrink free. Sealants should also have excellent bonding and adhesion properties so that these do not come off when subjected to the sun rain, heat or cold temperature.

After application and on drying, these should form a permanent elastic rubber-like seal to serve their purpose. These should therefore be UV resistant and should offer a long-term durability.

Apart from this, we want to tell you briefly about commonly used sealants among different types4. Silicone sealants are the most commonly used sealants. These are transparent and take 10 to 20 minutes to form the sealing skin over the joint or gap. There are two types of silicone sealant preferred to be used for homes.

  • General purpose silicone sealant – It is a type of sealant which is used in interior areas.
  • Exterior grade silicone sealant – It is the type of sealant which is used in exterior areas. It is more chemical resistant and can withstand different weather conditions.

Benefits of using sealant at Home

Using a good quality sealant can be very beneficial in protecting your home.Proper sealing of windows and doors is something that should not be overlooked. Now let us walk you through benefits of using sealant (related to the common use of sealing around door and window frames) which will be helpful in understanding its importance:

  • Saves from damage to the home/property: Due to unsealed gaps around windows (reason can be sealant deterioration or sealant not being used) and doors, the moisture / water may seep into your home. Most common damages inside homes occur due to water seepage through the gaps between window frame & external wall. This gap will be a source for moisture to flow inside the home. If the gap is not filled properly, it will lead to moisture intrusion, paint deterioration & damage to walls and other associated areas. This point is applicable to other areas of the home as well where sealant is used. Hence using sealant and checking its condition can avoid the entry of moisture in your home.
  • Keeps Insects away:Unsealed windows and doors make it easy for little creatures like mosquitoes, ants, spiders etc. to invade a home.
  • Health Factor: Besides the fact that it will keep insects from moving in, it can also be beneficial to keep pollen and allergens outside. This can be extremely helpful for those who suffer from seasonal allergies. Secondly, as we have already mentioned that moisture intrusion can occur in the home due to unsealed gaps. This will not only damage the property but also cause health hazards due to moisture.
  • Improves Energy Efficiency: If your doors and windows are properly sealed, then the temperature of the room can be maintained or regulated during both seasons (summer & winter). Improper sealing ultimately makes it more difficult for a cooling system like Air conditioner (AC) to regulate temperature. When AC is constantly working harder to regulate the required temperature within the home, chances are that energy costs will increase. Not only it will be more expensive, but it will also put more stress on the system/appliance than necessary.
  • Obstructs outside noise: Sealing windows and doors properly can also prevent street noise from entering your home and residents can continue to enjoy the peace and serenity inside their home.
  • Well maintained Window: A buildup of moisture being untreated for a period of time can cause your window (or door) to begin to warp and lose shape. Checking the condition of sealant is one of the tip for window maintenance.

Conclusion

Sealant plays a significant role in your home. When unwanted gaps are properly sealed, deterioration can be over and you can enjoy your life’s big investment for a long time. Our objective of writing this content was to tell you about the usage and importance of sealants for your home. Also, we wanted to create awareness that sometimes a small defect in your opinion like a gap around the window frame or sink, if left unnoticed can create a much bigger problem in the future.

Understand the Residential Plumbing System

Your home’s plumbing system is important to keep your standard of living comfortable. If it is not working properly, you would not be able to take a shower, wash your hands, use the toilet, wash utensils, or run the washing machine. Plumbing systems are responsible for quite a bit. However, most people do not know what their plumbing system is. They just turn the handle or press a button and expect the water to come out at the pressure they want.

As a homeowner, it is important to have a basic understanding of how your plumbing system works so that you can take better care of it and prevent a costly breakdown. Because plumbing is complicated and one of the costliest systems to repair or install in a home, it is important to understand how the system works.

The residential plumbing system is a complex network comprising of hot & cold water supply pipes, fixtures, drain pipes, traps, valves,vent pipes, water storage tanks, etc.

A plumbing system serves two purposes: to supply water for human use, and to get rid of human wastes. It consists of a store of water that is distributed to various outlets.

1. Objectives of a Good Plumbing System

A good residential plumbing system makes a home a more comfortable and liveable place for the family. Ideally, it should:

  • Consistently supply safe drinking water
  • Efficiently collect and dispose of wastewater
  • Have no leaks that can waste water and create further problems
  • Prevent foul odours from escaping the system
  • Prevent clean water and wastewater from mixing together
  • Be connected to fixtures that meet quality standards

2. Essential Parts of Residential Plumbing System

  • Water Supply System (flow of water into a house)
  • Fixtures and Appliances (where water is used for carrying out various activities)
  • Drainage System (collection and disposal of used (waste) water)

a. Water Supply System

  • We are all aware that Potable water is supplied by the municipality or through private underground bore well.
  • This water enters a house through the main supply line. Water supply in a house is either of direct water supply system or an indirect water supply system.Let us understand it briefly:
    • Indirect water supply system: Water from mains is conveyed to storagewater tanks. The underground storage tank is connected to an overhead tank via a pump and a supply line; the water flows from there to any tap or outlet by gravity. This system is mainly used when water pressure in mains is not sufficient enough to deliver water at all faucets with adequate pressure. In India, usually we follow this system.
    • Direct water supply system: All water outlets of a house receive water directly from the underground tank with the use of a pump that supplies the water directly from the underground tank to all outlets. Such a pump should be able to continuously supply the line with pressure, so that whenever one opens a tap, water flows out.

To understand in detail about both direct and indirect water supply system, click here1.

b. Fixtures and Appliances

Fixtures, which are typically equipped with faucets, are needed so that the water supply can be used properly. Examples of these are showers, bathtubs, toilets, and sinks. Electric appliances such as dishwashers, washing machines, and geysers use water and must be connected to the waterline. The water in the pipes need to exert a bit of pressure so that it can be used in fixtures and appliances.

c. Drainage or Waste Water Disposal:

The wastewater system collects and disposes of wastewater through the use of gravity. The used water goes down drain traps that prevent foul gases from being released inside the home. The wastewater exits the home through the wastewater mainline, then it is collected in the septic tank or the municipal sewer line.

3. Areas and basic components of plumbing in the Building

a. Bathroom: Basic plumbing components in a bathroom are:

  • Main valve – to control the water flow
  • Basin – only cold or cold + hot inlet point & one outlet point
  • Water Closet – Health faucet point, cistern flush inlet point, outlet soil pipe
  • Shower – one head shower, one faucet, shower diverter, one floor outlet pipe
  • Geyser – inlet cold line & outlet line
  • Additional points like bathtub, washing machine, etc

b. Kitchen: Basic plumbing components in a kitchen:

  • Main valve – to control the water flow
  • Sink – only cold or cold + hot inlet point & one outlet point
  • Additional points like dishwasher, washing area tap point, etc

c. Roof/ Open terrace/ Balcony:

Basic plumbing components in a balcony/open terrace:

  • One or more rainwater outlet pipe

Basic plumbing components in a Roof:

  • One or more rainwater outlet pipe
  • Water tank & pipelines

4. Types of Plumbing Pipe lines in a Building

There are mainly 3 types of water running in a building:

a. Supply Water

  • Generally, single source of water (eg bore well water) is used for every use. i.e. drinking, cleaning, bathing and toilet flushing.
  • In a large complex with STP plant, water from plant is used for toilet flush only.
  • In some areas, water from the government body is used for drinking purposes Only. Bore well water can be used for other purposes.

b. Waste Water: Two different pipes are used for waste water:

  • Floor outlet pipe i.e. bathroom & kitchen waste water from bath & cleaning
  • Soil pipe – used for WC outlet pipe

c. Rainwater: Rainwater pipe is used for roof & open terrace rainwater outlet.

Apart from this, a vent pipe (usually connected to the soil and drain pipe) is provided for the purpose of the ventilation of the system. A vent pipe is open at top and bottom, to facilitate the exit of foul gases.

5. Types of Plumbing Pipes

a. Fresh water pipes

  • Unplasticized polyvinyl chloride(UPVC)
  • Chlorinated polyvinyl chloride(CPVC)
  • GI pipe (Galvanized iron pipe)
  • Copper pipe
  • Stainless steel Pipes
  • PEX or Cross-linked Polyethylene Piping
  • PPR pipe

b. Waste/soil/rainwater pipes

  • Cast iron Pipes
  • PVC pipes

There are various other types of plumbing pipes for residential buildings or others. Each pipe has its different characteristics and application.

Conclusion

This is your home’s plumbing system in a nutshell. It is much more complex than this, but with these basics in mind, you will hopefully have a better understanding of how your plumbing works and where a potential problem could be. If you would like more information about plumbing, have any questions regarding your plumbing system, want to have plumbing maintenance or you are experiencing a problem and need professional help, then click here.

Common Plaster Defects and their Cure

A home is a dream for most of us. We decorate our home in many ways. One of the ways is painting our home with our creativity and choice. Painting is usually done on the plastered surface by the following steps1. If the plaster quality is not good enough it can cause many problems later.

Plaster is a common material used in construction all around the world. Easy to work with and also easier to repair. However, there will be times when your plaster starts to show signs of wear and tear or other problems.

Understanding what type of problems can occur and its causes, you can resolve them before they become bigger issues. Today we will walk you through several common plaster defects and their primary causes & prevention.

1. Blistering of Plastered Surface

Blistering is the formation of small patches of plaster, swelling out beyond the plastered surface, arising due to late slaking (addition of water to lime) of lime particles in the plaster. This defect is usually caused due to the uneven mixing of plaster.

How to prevent it: This can be prevented by ensuring appropriate mixing between cement and it’s components used to form plaster.

2. Plaster De-bonding

De-bonding occurs when a plaster is separated from the wall. It can be caused by an excessively thick plaster layer, inadequate substrate preparation or may be due to a dusty, oily or dry substrate.

How to prevent it: To prevent de-bonding of plaster, we need to take care of the following things during plastering.

  • Remove dust & oil from the substrate before plastering.
  • Allow substrate to reach correct moisture content.
  • If necessary you should use bonding chemical.

3. Cracks on Plastered Surface

One of the most common problems you would have observed in plastering is the crack. Cracks on the plastered surface can be in different forms:

  • Crazing – It is a network of fine cracks like spider web. They are usually very fine and do not extend through the whole depth of the plaster. It occurs due to presence of excess fine content in the sand or due to dry base on which plaster is applied – when base absorbs the water and fines accumulate on the surface, it leads to crazing.
  • Separation crack at joints – It usually occurs at joints of two different materials for example at junction of RCC & Brick work. It occurs due to differential thermal movement.
  • Crack with Hollowness – This crack occurs due to hollowness in plaster. Other reasons could be extra water in the plaster mix or due to poor workmanship.

How to prevent it: Mainly cracks occur due to bad workmanship or expansion and shrinkage in the plaster during drying. Below are few tips to prevent cracks:

  • Ensure the addition of water in mortar done is by skilled mason and not by unskilled labour to ensure desired workability in terms of handling and application.
  • It can be avoided by proper curing of the plaster in order to slow down any rapid drying.

Taking care of workmanship and material quality issues will help in preventing cracks.

4. Efflorescence on Plastered Surface

When a newly constructed wall dries out, the soluble salts are brought to the surface and they appear in the form of a whitish crystalline substance. This is called efflorescence. Efflorescence is formed on plasters when soluble salts are present in plaster making materials as well as building materials such as bricks, sand, cement etc. Even water used in the construction work may contain soluble salts. It seriously affects the adhesion of paint with the wall surface and causes further problems.

How to prevent it:

  • All Construction materials used for wall should be free from salt.
  • Ensuring that the surface is moisture-free.

5. Falling Out of Plaster

This defect can happen in two forms – Flaking of plaster and peeling off plaster.

Flaking of plaster: The formation of a small loose mass on the plastered surface is known as flaking. It is mainly due to bond failure between successive coats of plaster.

Peeling off plaster: The plaster from some portion of the surface comes off and a patch is formed. This is termed as peeling. It is also mainly due to bond failure between successive coats of plaster.

How to prevent it: Both defects can be prevented with proper material selection and surface preparation. Imperfect adhesion can be minimized by good workmanship.

6. Popping of Plaster

Popping is the formations of conical like holes that break out of the plaster. It is caused due to the presence of contaminant particles such as burnt lime or other organic materials in the mix of mortar.

How to prevent it: To prevent popping in plastering, you need to ensure that no contaminant particles are present in the mortar mix.

7. Loose Plaster

When the plaster gets displaced on external impacts like application of material or tapping, etc, it is termed as loose plaster. This is caused mainly due to improper mixture and inadequate curing.

How to prevent it: It can be prevented with the use of proper mixture and adequate curing. Good workmanship will help in avoiding this problem.

Apart from the above defects, Uneven or undulation also occurs at plastered surface. The plastered surface should be in perfect plumb and without any undulations. Unevenly plastered surface happens due to poor workmanship2 of the plastering work.

After knowing the defects, read some precautions to be taken while plastering:

  • The areas that need to be plastered should be washed and kept wet.
  • All loose material sticking to the masonry should be removed before plastering.
  • The joints should be cleaned by brushing or scrapping with wire brushes.
  • The uniform level is tested with plumb-bob before & after applying the plaster.
  • Specified cement, sand ratio should be used while making cement mortar.
  • Ensure proper bonding between the surface of masonry and plaster.

Apart from these precautions, Skilled workers and good quality material should be used to minimise the defects3.

Conclusion

Plastering not only makes the surfaces smooth but gives a good finishing to the walls, ceiling and other parts of building. It is an important part of construction. To ensure good quality of plaster, it is important to know about the defects in plastering. Our objective of this content was to create awareness about various defects in plastering and its prevention. We hope this information will be helpful for you. And if you want a professional advice, then you can contact home inspection services who can inspect your property. Opting this service will give you information about issues and long term solutions for all types of defects in your home/property.

6 Staircase Safety tips for Homes/Offices to prevent from Slips, trips and falls

Staircases are being used from the ancient times and the importance of the staircase remains the same even in the 21st century. These are very common walking surface in most workplaces, residential complexes and individual homes.

The Staircase is an important component of a building which helps in commuting between floors and roof. Improperly designed staircases can cause falls which may lead to severe injuries or accidents if the necessary guidelines are not followed properly. A combination of deficiencies in design, lighting, maintenance and others are usually the culprits in stairway slips, trips and falls.

Let us first understand some of its basic parts. Staircase typically consists of:

  1. Landing Platform
  2. Handrail or Stair Rail System
  3. Steps (Riser & tread) – A step is composed of tread and riser. Tread is the horizontal top surface to press beneath the feet. The riser is the vertical portion between each tread on the stair

To prevent falls or accidents due to staircase, below are some informative tips for safer stairway design, maintenance and use etc:

1. Optimise Riser and Tread Design

Trips and falls that occur during stairway ascent are often attributed to variation in the riser, tread. Stair riser heights should be 7 inches maximum and 4 inches minimum & tread depth to be minimum 10 mm. To know more, click here1.

Ideally, all tread and riser dimensions should be uniform throughout the entire stairway. When we use stairs, we tend to follow the same steps again and again until we reach on a plain surface. So, make sure that there are no uneven steps in your staircase and all steps areof the same size.

2. Do not neglect Stair rails or handrails

Stair rails and handrails are needed for very different purposes. Stair rails protect pedestrians from falling off the edge of the stairs or landings while handrails help pedestrians keep their balance and provide leverage when ascending or descending stairs. They greatly reduce the chance of a fall, they are strongly recommended, regardless of the number of steps.

You need to install stainless steel handrails that are slip-resistant because they can provide you utmost support and they need less maintenance cost. And, if you already have handrails, check its functionality.

3. Eliminate Tripping Hazards

Firstly, these can happen due to distinct level difference at the transition area between the entrance of staircase and other associated area at office or individual home or lobby at the residential complex. Secondly, we tend to keep a lot of items around stairways that are major tripping hazards. Here are a few to be mindful of:

  • If electrical cords are left open, use some tape to pin electrical cords along the baseboards, so that it is out of the way.
  • Furniture near or on the landings should be rearranged to keep pathways free.
  • Do not store anything on the stairs, even temporarily. While there is plenty of decors that can add to the aesthetic of your stairs, but remember it all increases the risk of falls.

4. Prefer Anti-slip Surface

This is one of the most important factors that can prevent accidents. The staircase should be made with slip-resistant materials, otherwise, can be dangerous especially for children and elders. You can reduce the risk of the slip by using anti-slip materials in the stair treads and landing surfaces.

People often use anti-slip materials on the leading edge of the treads to prevent slip-related incidents. Slip-resistant or anti-skid paints2 are also available and you can use them on your staircase.

5. Ensure better Visibility

Staircase should be illuminated by enough lighting so that users can watch each and every step precisely. If you have children and elders in your family, you should not compromise with your lighting system, because better visibility will ensure safety for your dearest ones. Low light can be an issue for the elders and it can prevent them from noticing steps clearly.

6. Maintenance and Use

Many stairway accidents occur due to poor maintenance, non-attention and use. Keep stair treads clean and in good condition. There can be rusted handrails, loose fasteners resulting in the further deterioration with time. If left unattended can lead to accidents or injuries.

Apart from these, there isa last tip which can only be followed by individual homes i.e Install Safety Gates for Babies & Young Kids – If you have little ones roaming around, place child safety gates at the top and bottom of your staircase, so that they cannot access it by themselves.

Conclusion

The fact is, most falls can be prevented; and that prevention starts by acknowledging that there are always risks when using the stairs.By implementing simple strategies, keeping your stairs in good shape, and staying focused, you can help put an end to falls and serious injuries in homes and offices3. Also, read how to use stairs safely4.

We hope this content is helpful in creating awareness about safety of your staircase. If you still want to take professional advice for checking its safety and other problems, you can click here.

Understand the problems due to incorrect slope in wet areas of your home

Whenever you need to drain the water off your floors, whether it is your bathroom floor or any other wet area of your home,the proper slope at flooring helps to run the water off efficiently. Incorrect floor slope can cause water to run in the wrong direction, instead of gently sloping towards the drain.

Now a question would arise in your mind – ‘What is Slope?

The Slope of a surface means the surface of which one end or side is at a higher level than another, a rising or falling surface.

When you install tile in wet areas, do you ensure that everything slopes to the drain? If not, let us understand its importance through this content.

Firstly, let us know the areas of home/ office where slope plays a significant role.

Slope requirement in your home or office

There are floor surfaces in an apartment or home that require slope. Each surface given below needs a different slope:

  • Bathrooms
  • Balconies
  • Kitchen
  • Terrace
  • Drains & Plumbing lines

Apart from floor surfaces, window sill and chajja also have a slope requirement. But we would be focusing on the slope at flooring. Slope requirement also depends on two factors, click here1 to know more.

Generally, there can be two cases of incorrect slope i.e slope in improper direction and inadequate or insufficient slope.

Let us discuss what problems can occur due to inadequate slope or slope in improper direction at flooring.

Problems due to inadequate/improper Slope

Due to incorrect slope, floor water will not drain easily through floor drain outlet and will lead to formation of water pocket or accumulation at a corner.

If it is not rectified in time, it can lead to following problems or issues:

  • Damp / seepage related issues in the adjacent wall or floor surface
  • Fungus issue on floor surfaces
  • Strength of Flooring & wall surface will get decreased
  • Unhealthy living conditions in the house
  • Safety hazard

Solution for this issue: We recommend review and if required, floor tiles to be relaid maintaining proper slope towards floor drain outlet and adequate strengthening with requisite type of sealant at floor and wall tile junction.

Ensuring that a proper slope is provided around the drain for water to flow out easily is very important. Good drainage in wet areas like shower area in the bathroom is a key to preventing problems related to damp/moisture, so read content related to recommended slope2 for it by Home guides.

You can also read content on How to slope a floor for drain3.

Lastly, we would like to conclude, Flooring with proper slope is ideal for bathroom floors, balconies terraces etc; floors on which water flows on frequently. You don’t need it much for areas like your living room, drawing room, or any other room that stays dry. The main objective of sloping is to protect the property from damage that is associated with incorrect slope.

We hope this content will be useful in creating awareness about the problems that may arise due to incorrect slope at flooring in wet area.

Tips to maintain balcony Railing of your home

Good quality & Safety are the most desired attributes for our homes. When we are standing on the edge of a balcony many of us often overlook the importance of railings.

Although many of us use railings everyday, we do not often stop to consider the significance of it for safety. We like to lean on them, but we often take for granted the fact that our railings are strong.

It is easy to assume that your railings are in good shape until proven wrong, but just like any building material, they can also fail. So today, we are here to share with you its advantages & importance and some tips to maintain them.

Advantages of balcony railings

Using durable balcony railings are crucial for ensuring all-around home safety. Some advantages of railings are as follows:

  • For Balance: When a person loses balance on a platform, they usually cling to the railing. It provide stability – which is important for children and the elders.
  • Prevention: To protect curious children and pets, railings provide a needed barrier which prevents from accidents.
  • Comfort: During wind movement, high platforms can be dangerous. Railings provide enhanced support and allow others to feel more comfortable walking in balconies.

Apart from this, in reference to affordability, balcony railings are considered to be an affordable option in comparison to costly liabilities that occur without them. In this way, these are important.

Some tips to maintain railings in your homes

After understanding about railing, maintaining the railings in your house takes a priority. Mostly mild steel railing is used in home. Some tips for maintaining them are below:

1. Check and repair rusted railing

Rust is not only a visual problem. It is said that rust is like the disease of cancer in the world of metals. It deteriorates the metallic material from inside. When iron comes in contact with air and moisture, it produces iron oxide which is known as rust.

Deposition of rust on railing corrodes the railing further and ultimately causes damages to it. So, the removal of rust or repairing a rusted railing is essential to protect the railing.

Remember, no painting protection will survive long if you do not remove rust from the original metallic surface. Hence cleaning is vital for repairing rusted railings. So for rusted railing, clean and sand off rust from affected surface and apply red oxide primer1 over it along with oil paint.

2. Ensure tightness and repair loose fasteners

After removal of rust on a railing, you should check all joint of railing using screws and bolts. If there is any loose joint, immediately tighten the fasteners with the help of a screw driver. Replace the bolts or screws if they are not sufficient to ensure the tightness of the joint of the railing. If the existing screws are not enough to tighten the joint, you should select a larger screw or a wall anchor to ensure the tight fittings of the joint.

3. Repair paint deterioration

If there is any paint deterioration, clean and repaint the affected part to avoid any type of other defects like rust too. If you feel that if there is requirement of reapplying of primer, then it can be done before applying the paint.

4. Look at the bottom portion of railing

Observe the condition of bottom portion of railing and sill. If there is some damage or cracks, repair them as soon as possible to avoid any future problems.

5. Check the gap between wall and railing

If space between wall and railing exceed more than 4 inches, then it will create unsafe condition for kids. Read: Make your home safe for kids.

Conclusion

Beware of poor quality balcony railings2 at your home or apartments. If railings are not maintained properly, they can cause safety hazard. Our objective was to make you aware about the role of railings in your home and tips to maintain them. It is important to take care of railings as soon as possible the trouble is detected.

10 Hacks to Make Living Alone Easier for Old Parents

When parents get old, they become somehow dependent on their grown-up kids. Their physical and emotional well-being becomes a serious concern for their children, and taking care of them turns into a round-the-clock duty regardless of whether they stay with them or alone in a separate establishment. Now, it’s an obvious thing that elderly parent care cannot be completely stated. It differs depending on the general health, personal discretion, and available support system at home for the concerned seniors. However, the biggest concern is when they are left alone or unattended at home.

For ensuring safety of the seniors, we can make some arrangements at home so that their living alone becomes easier. Implementing these hacks will help us to trim down the chances of mishaps.

If you are one of those who have aged parents staying alone at home, you can use the checklist suggested here to assess the environment. Also, you can take other necessary steps to make it safer for your old parents.

1. A useful “to do” list to prevent falls

Seniors mostly suffer from balance and reflex problems. As a result, fall-off risk for them becomes a major concern. Making the home fall-safe is the best way to avoid any such accidents. You can try a few safety tricks:

  • Keep the floor free from clutter.
  • Discard the furniture that occupies a large amount of space on the floor.
  • Arrange non-slip footwear for your parents.
  • Don’t use extension cords across the floor.
  • Restrict the use of throw rugs on the floor.
  • Check if the floor tiles are too slippery and find out the reason why they are so.
  • Check for any leakage in the basin areas of the living room or kitchen. Get them repaired soon to avoid unnecessary flooding.

It is always desirable that our parents do not have to climb stairs to get some fresh air. They should have the privilege to enjoy nature in their balcony or lawn garden. If that is not feasible in your case then make sure the staircase has strong handrails to give support.

2. Keep emergency numbers reachable

Keep the mobile phones of your parents up to date in terms of saving the phone numbers, whom they should call in case there is an emergency in your absence, and that they never run out of balance. These numbers must include the contacts of the local police station, electric supply call centre, doctor’s number, phone numbers of the nearby home delivery food centres and similar other utility service providers including yours in the emergency dial list.

Arrange for them in an easy-to-operate basic mobile phone that they can handle easily. The handsets must be sturdy as well as offer longer battery standby time.

3. Maintain fire safety measures

A fire accident can cause severe disorder at home and it is highly traumatic, especially, for the seniors. Some of the prevention you must ensure are:

  • Use appliances with the best safety features. Get the servicing of AC machines, geysers, kitchen appliances, etc. done by authorized service centres at regular intervals. That will help you stay worry-free about their optimum functionalities.
  • If possible, install a fire alarm, where the smoke detector will keep your parents and the immediate neighbours alert.

4. Take care of the bathroom

A slippery and difficult-to-access bathroom is a real-life hazard for senior people. If you want to minimize the bathroom hazard for your aged parents, few safety measures will surely work.

  • Use non-slippery marble/ tile flooring.
  • Install grab rail beside the toilet seat and near the shower so that the users can maintain their balance better.
  • An exhaust fan or dehumidifier will help keep the bathroom floor dry.

Again, check for any leakage in the plumbing line to avoid constant dripping of water from taps and resultant flooding of the bathroom floor.

5. Take care of the bedroom

You may not have the idea that in your absence, your parents spend major time in taking rest or enjoying napping. Therefore, you must make their bedrooms safe enough. Some of the suggestions are:

  • Change the soft mattress into a hard one on bed. This will help in managing their joint pain.
  • Install a night bulb in the bedroom. Some good bedroom lighting options are wireless motion sensing lights, touch lamps, automatic night lights, etc. For advanced lighting solutions, click here1.

6. Arrange lights for safer movement at night

The arrangement of lights is important for the easy and safe movement of the seniors inside the home, especially at night. Check these points:

  • Use bright lights, because your parents may not have a bright vision.
  • Always stay alert for the lights in the rooms of the seniors. If you have a care taker for them, then get batteries and bulbs checked at regular intervals. If any of the bulbs or tube lights are not working properly, get it changed immediately. Trying to light a bulb and failing to do so might make them nervous. They may also collide against a wall and hurt themselves.
  • Preferably make them two-way switch arrangements.

Additionally, if possible install a high-capacity inverter as a backup plan for power cut.

7. Modify the kitchen

In the kitchen, keep things within the reach of the elderly people. Some of the suggestions are:

  • Keep hazardous materials away from general access.
  • Arrange for a microwave oven for heating foods. The use of a gas oven may not be safe for your aged parents.
  • Install easy-to-operate faucets in the kitchen so that they can open and close the taps without putting too much effort into it even in your absence.
  • Keep adequate storage of foods and that too within easy access; aged people may feel the urge of having foods/ snacks in odd hours.
  • Check & Discard food items with an expired date, at least, once in a month.

8. Take care of the overall safety

This is crucial for stay-alone seniors. The main entrance should be absolutely secured, preferably with a double guard system in the form of a collapsible or grill gate fitted outside the wooden door. The lock system, the eye-hole everything should be in place and functional. Please click click to get more useful tips on safety enhancement at home.

9. Ensure electrical safety

Electrocution can be another dreadful accident. Keep your aged parents safe by following these electrical safety suggestions:

  • Check for any fault in the concealed electrical wiring system, switches, and fuses. How do you do that? Hire a professional electrical inspection company. They will warn you if something is wrong in the line.
  • Always use shockproof fixtures.
  • A damp house welcomes a myriad problems. Dampness near a switchboard or big electrical appliances can be a major source of accident. So, get your homes inspected and find a solution for damp.

10. Keep communication

Regardless of your frequency to return home, call your parents at least 2-3 times a day. Also, always attend their calls as a priority no matter how busy you are. It is advisable to keep handy the phone numbers of their nearest neighbour, a caregiver at home, or the security person of the building.

Also, make a few habits like

  • Taking care for their banking needs.
  • Taking regular care for their laundry so that they can feel relaxed.
  • Explaining them about the recent scams possible on the phone: once they will get to know the problems, they will not respond to any scam call.
  • If you have any outside assignments, communicate with them frequently so that they stay emotionally pacified and worry-free.
  • Arrange for their regular health check-ups so that your parents stay fit.

Check the availability of their regular medicines at home and keep a first-aid box ready with SOS medications.

Well, these are a few 10 hacks you should maintain to keep your aged parents safe and worry-free at home even in your absence. Sometimes, a situation may demand some more precautions. In that case, you have to enhance the security & safety system of your home. In general, precise care about the daily amenities and sincere care towards their well being can keep your parents happy and protected.

New Home? 7 Things You Must Do During the First Week

The joy and excitement of moving into your new home is something different. The mere feeling of living in your very own heavenly abode is enough to cause butterflies in the stomach! While the whole moving in process is a lot of fun indeed, it is not devoid of tonnes of to-do tasks, all of which are necessary things to be done before you can even begin to enjoy the feeling.

Here we bring to you 7 most important tasks to complete in the first week of your moving in so that you can relax and live happily ever after.

Things to Do in the First Week of your New Home

1. Turn on the Utilities if not done yet

You should have arranged the connection of the main house utilities before the move as it is an important step, but if you have not done yet for some reason then do it without delay. Naturally, the first utility companies to call are the power and water providers – things will look much brighter, easier and smoother once you have electricity, gas and running water in your new house.

2. Get a TV, Telephone and Internet connection

Let us face it electronic media is now a part-n-parcel of our life. You would need them particularly if you have kids, to engage them while you unpack and arrange items in the house. Even otherwise, they are a good way to relax after a few hours of tiring yourself out. And telephone and internet connection are also important for communication and you can shop through the internet, pay your bills etc.

Again, be careful about where you are installing the TV set or other. There will be walls adjacent to bathrooms and other areas with possibilities of damp or moisture intrusion. Avoid those places to reduce any chances of electrical hazards in the near future.

3. Share your new address and check security essentials

Once you are sorted on getting all the essential utilities in place, it is time to update your new address in all the important places it needs to be. Do not forget to share it with all your loved ones too.

Coming to the home itself, assess how do you find the security facilities there? Are the main gate of the building and entrance of your flat in their desirable states? Check for any issues in the door locks, doorbell, and other small things like an eye hole. To ensure further safety and prevent intrusion of any kind, you may consider installing CCTV cameras, motion sensors etc.

Pro tip – Remember to change the locks: This is very important if you are moving into a resale apartment. You never know who all has the key to this house. Your safety in new home is primary. Even if it is a new apartment, the keys may have been with the builders’ staff (painters, construction workers), so why take a chance? Also, now is a good time to call a locksmith before you begin your new life.

4. Sort out what you need and don’t need

Believe us, now is the best time to do it – you may never find time again once you settle down and start your everyday routine. It may be anything from clothes, kids’ toys, utensils, or even important documents (some of them only seemingly important). Set aside the ones which you think are not needed anymore and arrange the rest of the documents neatly in files and folders. Label and organize them so that you can find them easily when needed.

5. Clean up or hire professionals

A new house is not necessarily free of dust or stains. You will need to tidy up the place and make it suitable to start living in. If you find it difficult to manage everything yourself, hiring professional cleaners might be a good idea. They will take care of every wall, cabinet, and bathroom, damp stains there and literally spruce up your place to turn it to brand new.

Now here is a catch – if you come across any damp spot or seepage in any corner of your house, be alert. Is it just a simple water stain? Ask yourself. Removing the stain can certainly be a good idea but you must try to know the cause behind it. And for that, you must rely on a professional who are experts in damp inspection.

6. Arrange for help in unpacking

You will surely need one if you have kids around but even if you do not, it is fun to call friends and family to help you unpack. Doing it together helps you all bond up and makes things easier on you too, allowing you to take a breather and not tire yourself out unnecessarily.

7. Get a home inspection done

A professional home inspection is always a better idea to proceed. This should be the one of significant task on your checklist because it is extremely important to ensure that your new house is healthy. You have already spent a huge amount of time, effort, and money on home buying. Why spend more on fixing it up later? Home inspection would identify the exact problem areas so that you can get them rectified by the builder itself if it registered under RERA, before even moving in. These issues can be related to any corner of your home, any component, and of any magnitude. There can be a persistent damp problem, an error in the slope of floor, poor quality window and door frames and locks, rust-prone bathroom fittings, or a problem in the circuit breaker etc. From inspecting electrical wiring system and switches to checking lofts and balconies, plumbing systems, a home inspection does everything that is crucial for your hassle-free living.

Curious, how a home inspection can save you time and money? Here you go.

If there is any concealed leakage/ seepage problem, you can hire professionals who are expert in thermal imaging technology.

Additional tip: If you are planning to do interior designing of your house, start doing the research now. But before hiring an interior designer, don’t forget to get your house inspected professionally for better results. Only a healthy home can showcase a good decor perfectly.

The professional home inspectors will come over, inspect your property and help identify any potential damage. They will check for damp or other issues your house may become a victim to a few years down the line. In the case of resale properties, an inspection is a must because you don’t know how the earlier owners would have maintained the property. But don’t ignore inspections in new homes too as problems start surfacing there only after a few months.

Conclusion

Our objective was to make you aware about the important things/ task to be done in the first week of your home.

Moving in can be quite cumbersome but enjoy the fun and don’t forget to maintain your home well.

Primer : Is it necessary to apply it before Painting?

Painting any surface basically serves two purposes. It enhances the beauty of walls/ structure and also protects the surfaces of the structure. Before painting any surfaces, the application of primer is recommended. Some question arise, like – Why primer is required? Can’t we do away with primer by applying one more coat of paint? For a layman, the difference between the two is not easily understood as both look similar.

Before painting any structure, you should know the difference between primer and paint. Paint and Primer both are different products, though they look like same. They have a different purpose, function and constituents. We would first explain the primary difference between primer and paint.

Difference Between Primer and Paint

Primer

Primer is paint but without pigments, it primarily consists of resins. Primers are designed so that they create a bond with the sub surface and also with paint, to create a uniform surface which is suitable to receive the paint.

Function of Primer

Primer penetrates in the porous surface and seals the surface to ensure better coating and adhesion. It also hides imperfections and provides an even, smooth, and stable foundation for the paint. It is a problem solver providing good coverage.

Paint

Almost the major constituents of paint remain same as a primer, plus paints contain pigments, which provides the colour. Paints contain different types of additives than primers. These additives perform a different function like providing bond and adhesion, quick drying, durability, etc.

Function of paint

Paints add colour and shininess to the surface. They make the surface finished and provide protection. Pigments in paints also help in hiding the surfaces. There are many constituents added in the paint so that it dries quickly and it gives durability, i.e. life to the paint.

If the paint is applied to an unprimed surface, it may crack, peel off within few months. For paint to last long, priming the surface with the right primer is important.

Now, We jump into a commonly asked question i.e. Is it necessary to apply Primer before painting?

The primer as the name suggests, is the primary layer that is ready to receive paint. It is nothing but paint without pigment. It improves the adhesion of paint and thereby increases durability and life of paint film. Apart from this there are other uses of primer:

Primer before paint is like the base of your paint job and can be used on wood, plastered wall, concrete, etc. Applying primer coat over new surfaces reduces the amount of paint being absorbed by the basic surface. The primer will help you in hiding joints and other small defects, when it is applied to surfaces. Basically it is paint without pigment, it serves all the functions of the paint at a lower cost, as it is the pigment which increases the cost of paint. If primer coat is not applied, you might have to apply one more coat of paint, which of course will increase the cost. It increases covering capacity of the paint and thus decreases the overall cost of painting.

If suitably applied, primer will enhance the life of the paint, and also improve the appearance. Therefore primer before paint is absolutely necessary.

Some tips for Primer Application

  1. It is essential that the primer should only be applied to dry and clean surfaces. Before the application of primer coat, the surfaces are smoothened by sand paper and dust is removed.
  2. After the primer coat application, to ensure proper drying of the primer, the surface should be painted after a few days.
  3. The surfaces that have deteriorated should be cleaned properly before the application of primer.

And follow the instructions as per manufacturer’s specification.

Proper interior and exterior surface preparations combined with primer will build an effective barrier against stains and moisture and promote full adhesion of the paint. Primer is thus very useful as it reduces the cost of overall painting and also increase the appearance and life of the paint.

Benefits of Opting A Ready-to-move-in Home

The reason behind buying a house today is quite different from what it used to be a few decades ago. Our parents and grandparents considered buying or constructing a house when they aspired for a better lifestyle for their families. Securing the future of their children was their main motto. Now, when we look for properties, upgrading the lifestyle is not always the main objective. We either want to buy a house for accommodation or for the investment purpose so that if need arises and when the market conditions are conducive, we can sell it and earn a lump sum amount from it. Generating an income through rent is also on the agenda. Nevertheless, for buyers with an end-use objective, ready-to-move-in flats are a far better choice than under-construction properties.

Before we tell you the exact benefits of ready-to-move-in houses, here’s1 what real estate industry experts have to say about choosing a property for buying.

1. Timely Completion

The biggest advantage of ready-to-move-in flats is there is no scope of delay in completing the project. You do not have to worry “Will it be completed in time?” as in the under-construction projects. Instead, ready flats await you to take possession of them. Unless it is some unavoidable reasons on the developers’ part, you get to avail the satisfaction of owning a house timely.

2. Home Inspection Facilities

With RERA, it will be easier for you to implement a home inspection service and identify whether there is any issues present or not. Now, if any problems do occur, say a leaky pipe or clogged outlet, you can always ask the developer to take care of it. This way a ready-to-move-in flat saves you from receiving unpleasant surprises once you move in. All problems resolved, a home inspection allows you to start living in your house without the stress of discovering a creaky door, an absolutely out-of-place damp spot behind the cistern and so on.

Following are some of the major advantages of home inspection that come with a RERA-registered ready-to-move-in house:

  • It reveals all the masked hazards that may go unnoticed during the first walk-through. You are saved from the hassles that may arise from problems in the wiring, plumbing, damaged window and door parts, wrong sloping, and damp walls and ceilings, etc.
  • A timely rectification saves your money, time, and effort on recurrent future repairs.
  • If the property has damp issues but still matches your other buying criteria, you consider repairing it at the very beginning. This is because seepage, excess moisture, and dampness bring along with them pest problems and diseases such as allergy, asthma, skin rashes, and depression2.
  • The home inspectors enlighten you about the condition of all the components of your new home. So, you know when to replace them and calculate your cost beforehand.
  • You get an opportunity to learn from the home inspectors how to prolong the life of your biggest investment, that is, your home.

A comprehensive home inspection service covers all the indoor and outdoor spaces, plumbing and concealed electrical wiring systems and components, and an in-depth damp assessment. To have all your queries on home inspection answered, click here.

3. Immediate Possession

One of the prime advantages of a ready-to-move-in unit is immediate possession i.e. the absence of any waiting period. So, If you are in an urgent need of an accommodation of your own, a ready-to-move-in flat is the best option. All you have to do is make the payment, go through all the documentation work and move in.

Dhruv Agarwala, Group CEO, PropTiger Realty Pvt. Ltd3, recently said, “Considering 26% of all units set for delivery in the next 15 months are unsold homes, new homebuyers will have plenty of ready-to-move-in options to pick from.”

Hope you are getting an idea how many of them are out there for you? Pick any, get a final walk-through done, and move in immediately!

4. Uncertainty Omitted

When you go for an under-construction real estate, you are full of uncertainties. How big will the rooms be? Will the quality of building materials be good? Will I get a good view from my flat? Will all the amenities the developer is claiming to provide be there? And so on and so forth, right? But when you go for ready-to-move-in flats, it is all there in front of your naked eyes. You get to see what you are investing in because, after all, real estate involves a handsome financial transaction. With all such uncertainties eliminated, you experience a simpler buying process. Wouldn’t you like that as a homebuyer? You’d love it.

5. No Burden of Rent and EMI

While you choose an under-construction project, you have to bear both the rent of your current accommodation and the EMI of the bank loan you took for the chosen accommodation. But if you rest your eyes on ready-to-move-in properties the financial burden will go easy on you. No sooner do you buy the house than you start living in it. Also, if you do not plan to reside in it, you can always give it on rent and earn a handsome amount. Delayed possession will never be an issue.

6. Advantage of No GST

The GST rate was 8% earlier on affordable homes. But from April 1, it has been reduced to one percent only. Big relief, no doubt. But what if you do not have to pay that even that much? Wouldn’t that be great? As you opt for ready-to-move-in property, no GST is applicable for you. GST is only for the under-construction projects. What is better than saving money?

7. Tax Benefits

If you are an income tax payer, you get the benefit of tax deductions while you apply for loans. Section 80C of the Income Tax Act, 1961 enables you to avail about 1.5 lakh INR deductions on home loan principal repayment and up to INR 2 lakh deduction on interest payment. If it’s an under-construction project and the completion is delayed, you may lose tax benefit of 60,000-90,000 INR yearly. Thus, from monetary aspects, ready-to-move-in flats are more advantageous than anything.

A few words of advice for you here-while settling for a ready-to-move-in property, go for new ones instead of old resale flats. Old house already goes through the wear-and-tear of time and weather effects. When you get its possession, the old ones have already crossed at least a few years of its lifetime. But with a new property, the amenities and fixtures are brand new and hence, eliminate the chance of being problematic. Also, the previous owners may not agree to take care of the issues you identify due to financial reasons, etc. Additionally, in a few-years-old property, the development of surroundings also increases the price. You have to be ready for these situations. But of course, a prior home inspection will identify any such issues and if you feel, you may back out from the transaction process also.

A recent survey4 by the Economic Times revealed that about 59% people are keen about buying ready-to-move-in flats. The trend is rising in all metro cities including Kolkata, Mumbai, and Delhi NCR, etc. Now when you have all the advantages laid out in front of you, give it a thought. Of course, be cautious about the legal paper works. With RERA stricter than ever before, you don’t really have to worry about anything adverse. With more and more similar projects coming up, simply start living your life at your own house from whenever you wish.